I’d been watching a fair bit of YouTube channels, like Tech By Matt for the better part of a year, and what I really loved was all the different ways you could build a $200-$250 gaming machine that performed decently well. I used to be a PC gamer until about 10 years ago, when I switched to the Xbox360, then on to the PS4 in 2014. I still love my console game experience, but I was hoping to get more into the indie gaming scene, and that’s so much easier on the PC.
Quick jump to:
I completely failed to stay within my budget
And I’m not actually bad at math, most of the time. I kept finding parts that were close to what I was looking for, but just a little better, and for not that much more, but, it added up.
For instance, I initially was looking for Dell/Lenovo mid-to-large ATX towers with an i5-2400 processor, and 4GB of RAM, with the intention of bumping the RAM to 8GB. Then I found machines that had 8GB of RAM already installed, plus 1TB HDDs (more on that in a bit), and the next-gen i5 processor (3xxx series vs 2xxx series). I couldn’t help myself!
My budget was completely destroyed as soon as I found that Lenovo. I was hoping to spend about $100 on the case, motherboard, processor, RAM combo, and then add parts as needed. That would have worked great with any i5-2400 build I saw, but as soon as I realized I could get an i5-3470 or i5-3570 for around the same price, I stopped looking at 2400s. Being that the i5-3xxx are the generation after the i5-2xxxx, and about a year newer, it felt like a better deal.
What did $170 get me?
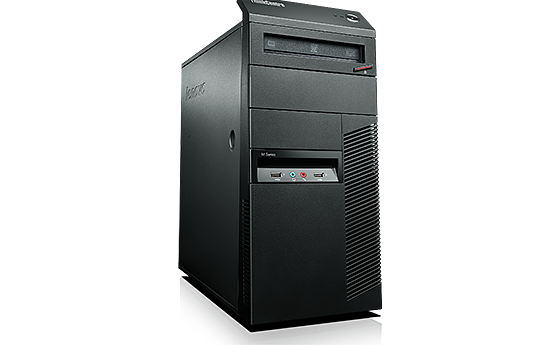
Lenovo Thinkcentre m82 specs
- Mid tower ATX case
- Lenovo motherboard
- 280W Lenovo PSU
- i5-3470 Intel CPU
- 8GB DDR3 1600 RAM
- 1TB Western Digital Black HDD
- DVD-RW
- OEM copy of Windows 10
Not too bad, I thought. Pricing out the additional parts felt like I was getting somewhat of a deal, and it saved me some time shopping around, or so I thought.
The Lenovo arrived within a few days, and I plugged that thing in right away. It booted, as advertised, and jumped into Windows 10, as advertised. The problems came with the hard drive. Yes, it was a 1TB Western Digital Black, but it was an old one. Years old, and it showed. It was loud; making lots of crunchy noises as it read files in/out of memory, and it was really slow. I think I saw it max out at just a few MB/s transfer, and the read-delays were verging on 0.5s, or higher. Making everything slow that needed to access the disk.
The Rest
Now I needed a new HDD, and that also meant I needed a new copy of Windows 10, because my build did not come with the activation key. In fact, it was an unactivated copy of Windows 10 that would require activation by June 2017. This was part of what I ordered, and I figured I could hold off on buying that key, but not anymore.
I found an OEM Windows 10 DVD + key on eBay for $40, and picked up a brand new WD Blue 1TB HDD off Amazon for $50.
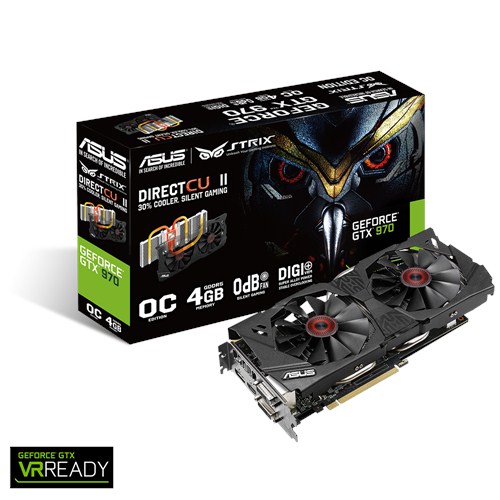
ASUS GTX 970 Strix

I was shopping around for a graphics card that would now compliment my CPU. I saw most people going with something like a GTX 950 2GB, or even an AMD RX 460/470. It was running anywhere from $130 to $200 for used and new cards. That would really eat into my already broken budget, but it was the second most essential piece to my “budget gaming PC” so I wanted it to be worth it, and not need to be upgraded within the year.
I came across a slightly used GTX 970, which was coming in $30 under other eBay auctions I’d been following. Plus, it was a “Buy it Now” option, so I could have it right away, and not have to try my hand at bid-sniping at the last second. I gave in. It’s a pretty sweet card, with some awesome cooling on it. It’s completely silent unless the temp goes above 70C, which I have yet to get to get. Once it gets a bit warmer, the dual fans kick on, but, again, I’ve not even heard that yet, and I’ve had it for almost two weeks.
The Power Supply
I knew that getting any GTX 970, or similar, would mean I’d need to upgrade my PSU: it’s a power-hungry card! I wanted to get at least a 500W so I’d be “covered”. I also had always heard that if you’re buying a PSU, always buy new, because you have no idea what a used one went through. I decided that was probably good advice, so that’s how I came to buy the EVGA 500W PSU off Amazon for $38.
The stupid motherboard
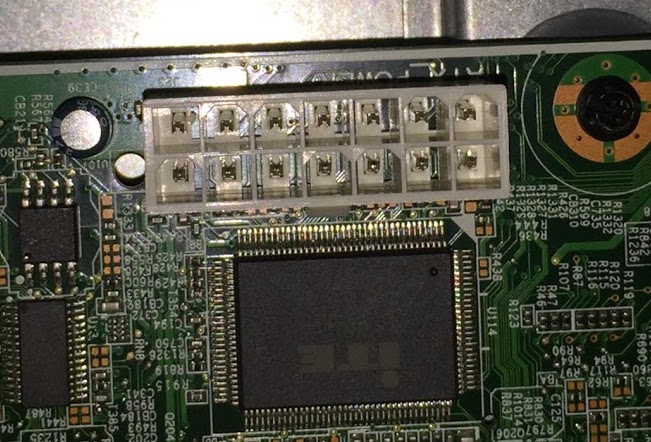
I had a few days for all my parts to arrive, so I thought I’d do some cleaning inside the case. That’s when I really took notice of the power supply pins on the motherboard. A normal pin config for power going from the power supply, to the motherboard, is 20-24 pin. Mine was 14. After a quick google search, I found dozens of articles of people buying second-hand Lenovos, and getting frustrated that there was no way to upgrade the power supply, because of this odd pin configuration. I was crushed! I felt my build was dead in the water, and that I’d have to find a new LGA1155 motherboard for my i5 (about $50), and blow my budget even more. Luckily, there was a handy adapter, just for this occasion, and I thought I’d risk it and buy it for $5.
Final build specs
| Thing | Price |
|---|---|
| Lenovo Thinkcentre m82 | $170 (used) eBay |
| Intel i5-3470 (3.2GHz, 4 core, 4 thread) | (part of the Lenovo) |
| Lenovo Mahobay Win8 Pro DPK TPG motherboard (what?) | (part of the Lenovo) |
| ASUS GTX 970 STRIX 4GB | $165 (used) eBay |
| EVGA 500W PSU | $38 (new) Amazon |
| 24 to 14 pin PSU adapter | $5 (new) Amazon |
| 1TB WD Blue HDD | $50 (new) Amazon |
| OEM Windows 10 DVD+Key | $40 (new) eBay |
| Total Price | $468 (+$218 over budget) |
It worked!
In order to see if the power supply and motherboard would play nicely, I setup my system without the GTX970 first, to ensure I wasn’t about to fry everything I just purchased. It booted just fine to Windows 10, great! I let it run for a bit, loaded up some 1080p videos, and even started up a steam game or two. Astroneer ran at about 10fps with the built-in Intel graphics card.
I shut it all down, installed the GTX970, plugged in the additional power cables it required, and rebooted the system, and it worked again! Got to windows, installed the nVidia drivers, and after another reboot, I was playing Astroneer at a steady 60fps!
Benchmarks!
| Benchmark Name | Score |
|---|---|
| 3DMark Firestrike 1.1 | 8607 |
| 3DMark Time Spy 1.0 | 3297 |
| Doom (1080p Ultra settings) | 56.62fps |
| Skyrim Special Edition (1080p Ultra settings) * | 52.48fps |
| Fallout 4 (1080p Ultra settings)** | 53.58fps |
| City Skylines (1080p Ultra settings) | 39.66fps |
* about 45 mods installed ** about 20 mods installed
Overall, I’m very pleased. I’ve thrown a lot at this little machine, and it is exceeding my expectations.
Also, in case anyone is interested in the FPS overlay I was using, it was CAM by NZXT. It wasn’t working inside of DOOM, so I had to use DOOM’s built-in performance monitor, which worked out well.


